27 Mar How to Set Up an Urban Cultivator (It’s Easier Than You Think)
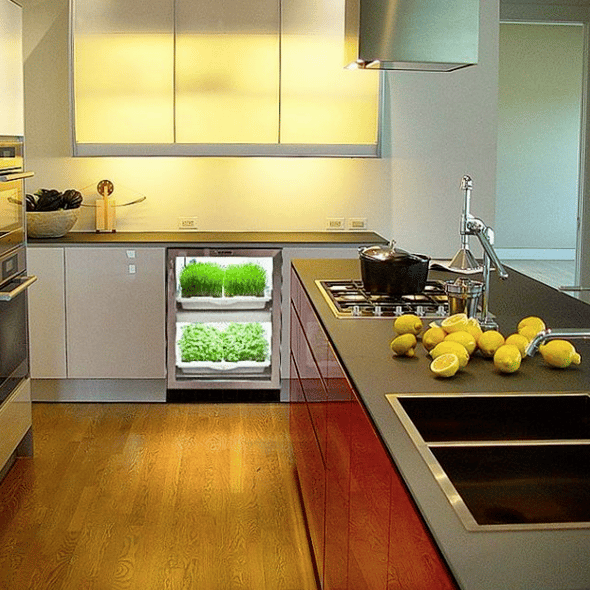
The Urban Cultivator Residential is a beautiful appliance. And perhaps to some, it looks like it could be difficult to install and to use. But guess what? Installation of the appliance is as easy as one, two, three.
And trust us—considering the fact that you’ll get to grow fresh greens all year long, setting it up properly is worth it.
So, let’s get started!
As with any appliance, it’s important to double check that you have all the components in your Urban Cultivator Residential kit. We’ll also include a checklist in your package, as well as a user manual. Hang onto that manual! Not only does it have everything you need to know about your unit, but we also have some neat tips and tricks.
Be sure to read all of the safety precautions before you begin using your appliance; always familiarize yourself with what you should watch out for.
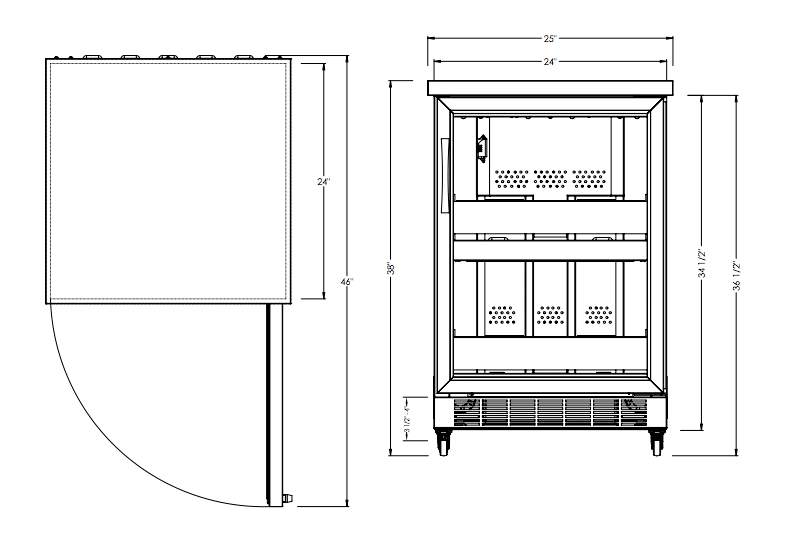
Now that bit of reading is out of the way, do you know where you want your Urban Cultivator to be? Here are the dimensions of the Urban Cultivator Residential.

If you’ve chosen to use your unit as a stand-alone mode unit versus a city mode unit, that will affect the location of your unit. If you’re plumbing in your Cultivator (the latter mode), you will need to find a space that’s close to a water source. Also keep in mind that if you had purchased a city-mode unit, your unit will not come with wheels, which will reduce its height.
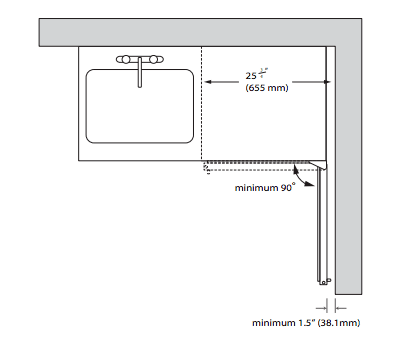
For both Cultivator modes, you’ll also have to keep in mind how far the door swings out. Give it a bit of room so you can pull the plant drawers out.

To set up your unit into city mode, have a certified professional connect your unit to your water and power source, as additional electrical work may be needed. Once the plumbing and electrical are taken care of, refer to page 15 of your Urban Cultivator User Manual to familiarize yourself with the functions of the buttons. For example, if you want to unlock your Cultivator, hold the ↓ and Enter buttons for three seconds.
After your unit has been installed, press Menu > Set Mode > ↑ > Plumbing to City Mains > Enter. This will now program the Cultivator to automatically fill and drain.
To fill for the first time. Hit “R” ↑ or ↓ till you see “FILL RESERVOIR” > Y > Enter. Water will start filling your Urban Cultivator.
To set up your unit into stand-alone mode, plug in your unit first. Then, remove the bottom grow drawer to expose the water reservoir. Using a bucket, tub, or hose, fill the reservoir with water until it’s full.
Your stand-alone unit will also come with castor wheels and a countertop piece. To install each of those respectively…
Castor wheels (this must be done before you fill the reservoir):
- Tip Cultivator on its back so you can access the feet and bolts.
- Remove the four bolts and one rubber foot from each corner on the bottom of your Urban Cultivator Residential.
- Secure castor wheels to the unit using the bolts.
Countertop:
- Remove the four black plastic filler pegs from the four holes in the top of the machine.
- Screw in the four stainless steel studs that were provided with your Urban Cultivator Residential countertop.
- Position the counter top piece onto the studs and slide towards the back of the machine to lock the counter top into place.
The major difference between the city and stand-alone modes are that the former will fill and drain automatically, whereas with the latter, you will have to change the water every week.
And that’s it!
It might look daunting, but it isn’t at all. Plus, Urban Cultivator offers seven-days-a-week customer service, so even if you get stuck, we’ll help you out through it all!
Just call us toll-free at 1-877-352-0490!
So what are you waiting for? Start growing!

